Introducing Sting Hackmap and Auto Tele
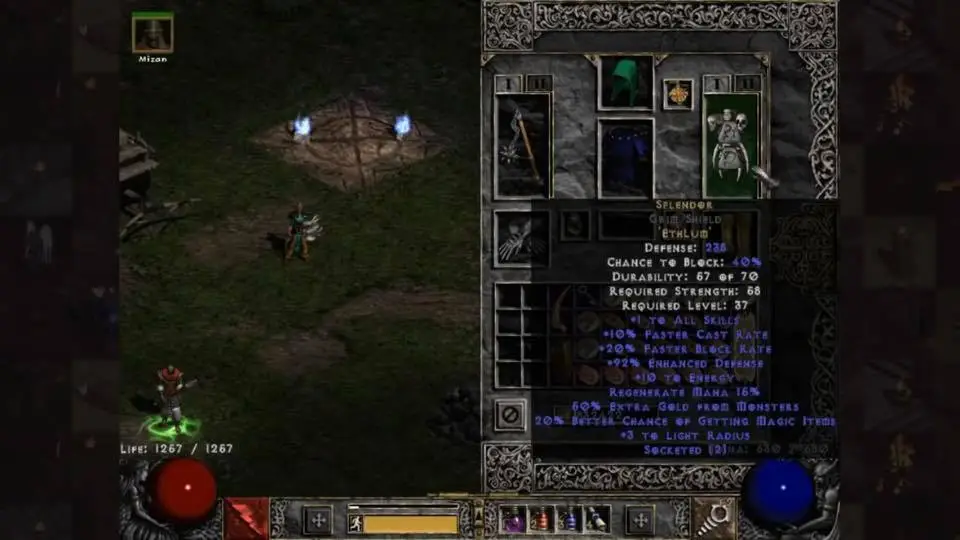
- Sting Hackmap : Is a tool that is allowed to support players with many useful features such as: hacking maps, viewing monster stats, hiding and showing needed items, viewing opponent items or expanding vision... very necessary when pvm and pvp.
- Auto tele : Also a tool that can be used to help players automatically teleport to the next map or NPC quest, or waypoint in that map. As the name suggests, it requires your character to have the Teleport skill. Using this tool will greatly reduce the amount of time and manual manipulation while farming (pvm).
Currently, both tools have been integrated and activated into the game when downloaded from the server's website. So you don't need to enable Hack Map, just go straight to the game and Hack Map will be automatically enabled for you.
Instructions for using Hack Map are available – Made by D2TM
Download Link:
- Step 1: Download the config file already available above.
- Step 2: Immediately after downloading the Config file, copy and paste it into the following path …/D2VNgames/diablo2/Tools/HM/
- Step 3: Enter the game as usual and press Numpad 9 to Reload Config
- Step 4: The screen in the left corner will display as shown, then it is successful!!!
- Note: If you are using a Laptop or do not have Numpad 9, exit the game completely to let the system load automatically.

Video tutorial:
Basic things you need to know when using Hack Map
I. Auto TELEPORT
You must have Teleport Skills to use it!!! Using Auto Tele is very simple, you go out to the village or at Waypoint and press these 4 Buttons:
Numpad 0 : Teleport to MAP next.
- For example: Standing outside the gate of village A1 is Map Blood Moon. Press the hotkey and it will automatically teleport to the next map, Cold Plain.
Numpad 1: Teleport to the QUEST – quests are in the map.
- For example, it is right at blood moon a1. Pressing this hotkey will Teleport to the Den of evil cave because there is q1 here.
- If there is no quest in the map, its function is to Tele to the next map like Numpad 0.
Numpad 2: Teleport to waypoint. If the map you are standing on has a waypoint, it will automatically Teleport to it and activate wp.
Numpad 3: Teleport to previous map. Similar to numpad 0 but Teleport to previous map.
II. Map Hack function in the game:
- Numpad 9 Key: Used to Reload Config if there is an error.
- Ctrl key: Toggles the display/hide of the filtered map.
- F Key : Use Alt-free replacement.
- ' : To turn on Chicken Life – with 10% of blood left, it will automatically kick you out of the Room to avoid dying!!! (Next to the Enter button)
- J key : To temporarily detach a Jeweler or Rune to view the main stats of the Items.
- Backspace key : Automatically Open Town to Village
- K key: Hover over another player and press K to see their items.
- U key : Auto Invite/ Party
- Insert key : Toggle on/off socket installation protection function (avoid accidentally installing Gems, Runes, Jewels)
- +/= key : Next to the Backspace key: autonext room. For example, if the room name is KL1, then the auto next room is KL2, and so on, add 1 number unit.
HACKMAP
1.To edit Hackmap, you turn on Launcher Diablo 2 up. Will see tab Edit HackMap.

2. How to open the operation files:

- Open Hackmap up, on the right side appears a small dialog box with 5 sub-operations.
- Select Config File. Use only the “Edit d2hackmap.cfg" and "Edit d2hackmap.vcb”. The remaining operations should not be curious.
- Operation "Edit d2hackmap.vcb” to open file “d2hackmap.vcb”. This is an important file to code items and monsters, define shortcuts used. Also defines some item groups, monster groups,…
- Operation "Edit d2hackmap.cfg” to open file “d2hackmap.cfg”. This file manages all operations, shortcuts, and displays in the game. - Immediately after the config, the path will be d2vngames/diablo2/tools/hm/d2hackmap.cfg => Your export file is d2hackmap.cfg
3. Remember these two things: minimize the modification of information in the file “d2hackmap.vcb” and write wrong commands in the file “d2hackmap.cfg”. The consequences are relatively difficult to manage.
III. Instructions for Config File “d2hackmap.cfg”
First, here is a list of items that players will almost always look for – Because they actually have value in the game:
List list: Click here
Fragment Map Lich King:
– Fragment 1 – fo1
– Fragment 2 – fo2
– Fragment 3 – fo3
– Fragment 4 – fo4
– Fragment 5 – fo5
Fragment Map Azmodan:
– Fragment Destruction – fr@3
– Fragment of Cursed – fr@5
– Fragments of Slyness – fr@4
– Fragment of Abjuration – fr@6
– Fragments Of Fogotten Soul – fr@7
Cow Level 2 :
– Cow Horn – coh
– Cow Doll – cod
First to work, you need to open 2 files. d2hackmap.cfg and d2hackmap.vcb at the same time
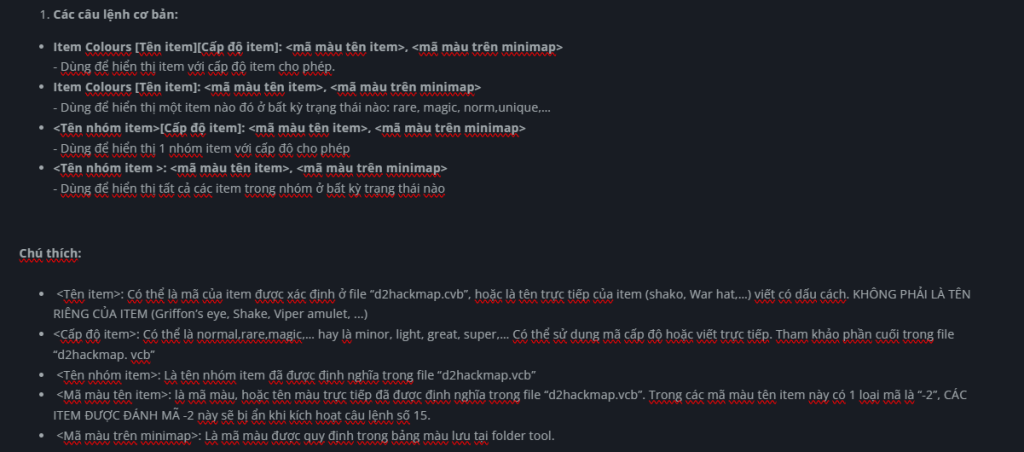
1. To start editing, scroll down to the bottom of the d2hackmap.cfg file + a standard command to display the item is:
- Item Colors[Item Name or Number][Item Quality]: X,Y
2. In which:
- Item Colors: is a required code when you edit an item, but for runes it will be Rune Colors
- Name or number: Is the exact name of the item you want to hide or show or its number. Each item is separated by a comma. To see its name and number, go to d2hackmap.vcb There will be a list to look up.
- Item quality: Is normal, magic, rare that we want. Here we can see the quality in d2hackmap.vcb.
3. Item material will be marked as follows:
- Low Quality, Inferior, Crude, Cracked, Damaged: 1
- Normal: 2
- High Quality, Superior: 3
- Magical, Magic: 4
- Set: 5
- Rare: 6
- Unique: 7
- Crafted, Craft: 8
Note: Just fill in the number. If you leave it blank, it defaults to all quality. - X : is to change the text color of the displayed item. For example, the magic brand has blue text, but if you change the color here, it will display the color you want. The color palette for mixing will be introduced later. If you leave it as default, enter -1
- Y : It is the decision to hide or show the item with
- -1 : Is present
- -2 : Is hidden
- 0 x B: This is the color of the item that appears on your minimap. Note that when you fill in like this, the item will appear by default.
FOR EXAMPLE:
1. Now I want to hide all items, mics poition… with quality of low quality, normal, magic rare and set, then my command:
- Item Colors[0-2139][1,2,3,4,5,6] : -1,-2
- Note in here 0-2139 is all 2139 normal items in the game. Don't write all or 0+ here because it will hide new mics as well as server items. I recommend using 0-2139.
2. I want to show all unique items and when any uni item drops, a red cross will appear on the mini map at the location where the item drops.
- Item Colors[0+][7] : -1.0×62
- Note: Here I use the command "0+" means all. number 0x62 is the code for the red color I mentioned. The color chart will be posted at the end of the article.
3. I want to display the white Berserker Axe and ETH to force Rune Word. Then the command:
- Item Colors[Berserker Axe][2,3][Ethereal]: -1,-1
- Note: in the example above, I used the name Berserker axe instead of using its number 201. When using a name like this, be careful to type the correct spelling of the item name, otherwise Sting will not understand.
- 1 more thing is that I recommend that when you want to find a specific type of item like I want to create a berserker like above, you should use its NAME instead of its number, because sometimes using the number often causes errors.
General notes:
+ The command below will take effect by inserting the command above. In example 1, I want to hide all the white rows, but below, I want to show the white row berserker axe, so I add the command like that. The result is that the white row berser still appears, but the white rows of other items are still hidden.
+ Sign ” // ” in edit file means that everything after it in the line has no value. Use the // before the command that you don't want to exist
+ For things that you want to leave as default and not touch, leave the value -1
OF COURSE THIS IS NOT COMPLETE AND IT IS VERY DIFFICULT TO UNDERSTAND AND REQUIRES A LITTLE KNOWLEDGE OF CODE. BUT IT IS ENOUGH TO CONQUER.
This is my map hack item editing code: You guys can refer to it and edit it to suit your needs:
….
Item Colors[0-2139][1,2,3,4,6] : -1,-2 // An item last
Item Colours[2017] : -1,-2
Item Colours[2053,2058,2063,2068,2073,2078,2093]: -1,-1 //show false gem
Item Colors[0+][7] : -1.0×62 //unique item
Rune Colors[0-16] : 1,-1 //quick rune
Rune Colors[16-22] : 4,-1 //medium rune
Rune Colors[22+] : -1.0×20 //high unique rune
Healing Pot Colours[1,2,3,4,5]: -2 // Hide healing
Mana Pot Colors[1,2,3,4,5]: -2 // hide mana
ITEM Colours [2008,2009, Box]: 1, -1 // SHOULD Heart '
Item Colors[Gold_Items] : -1,-1 //show item 35k gold
Item Colors[Colossus Voulge][2,3][Ethereal]: -1,-1 //item to be restored
//Item Colors[Sacred Armor][Ethereal]: -1,-1 //item for repair
Item Colors[Berserker Ax][2,3] : -1,-1
Item Colors[Small Charm] : -1.0x9b
Item Colors[Grand Charm] : -1.0x9b
Item Colors[Colossus Blade][2,3][Ethereal] : -1,-1
Item Colors[Colossus Sword][2,3][Ethereal] : -1,-1
Item Colors[Grand Matron Bow][2,3] : -1,-1
Item Colors[Hydra Bow][2,3] : -1,-1
Item Colors[Jewel][Unique] : -1,-1
Item Colors[Flail][2,3] : -1,-1
Item Colors[Crystal Sword][2,3] : -1,-1
Item Colors[Bone Wand][2,3] : -1,-1
Item Colors[Lich Wand][2,3] : -1,-1
Item Colors[Diadem] : -1.0×62
Item Colors[Phase Blade][2,3] : -1,-1
Item Colors[Vortex Orb][2,3] : -1,-1
//Item Colors[Diadem] : -1,-1
//Item Colors[Diadem] : -1,-1
//Item Colors[Diadem] : -1,-1
//Item Colors[2001-2122][2]: -2, -1
//Item Colors[Amulet][Magic]: -2, -1
//Item Colors[Ring][Magic]: -2, -1
//Item Colors[1-306][1,2,3,4,5,6]: -2, -1
//Item Colors[1001-1202][1,2,3,4,5,6]: -2, -1
//Charm Colors[1+]: purple
Good Gold Number: 10000 // minimum amount of gold to display
As for the Color Palette, go to the game folder in the Sting hack map folder and you will find the color palette as shown in the picture. How to read:
0 x

IV. Explaining “d2hackmap.cfg”
This is just an explanation of the commands available in d2hackmap.cfg – So the settings in here are not the same as everyone else's.
note:
- This is the file that contains all operations, displayed directly in the game. Includes commands to assign shortcut keys to operations, displays.
- Changing the information in here is relatively safe, but that doesn't mean you can write whatever you want. Anyway, it's better to be careful than to make mistakes.
- Because there are quite a lot of commands here, I will mainly only guide the necessary commands. There are places I don't know, I hope you understand!!
- In this file, any line with a “//” at the beginning of the line means that the command written on that line is hidden - in other words, it has no value. To reactivate that command line, simply delete BOTH “/”s.
Details in File:
– This is the file that defines and codes all types of items, areas, and monsters in the game that we can manage. Changing information in this file requires more care. Avoid duplicate codes, using characters with coding errors (for example, mistype ASW as ÁW), etc.
Of course, if you are "sure-handed", changing the codes in here as you wish will be more comfortable than in the operations in the "d2hackmap.cfg" file.
1. Item codes: Weapons, Armors, Miscs
- Weapons codes are numbered from 1 to 306, and include weapon types (including wands, staves, and class-specific weapons).
In addition, each item also has accompanying text codes (including letters and numbers). - Default coding feature: Code each item line (eg axe line first, when axe is finished, move to another line,...) in order: all normal items of that line first, then exceptional, then elite.
- Armors codes are numbered from 1001 to 1202, including all types of armor, helmets, shields, belts, gloves, shoes (including class-specific items).
- Default coding characteristics of weapons and armors: Code each item line (eg axe line first, run out of axe then move to another line,...) in order: all normal items of that line first, then exceptional, then elite.
- Miscs codes are numbered from 2001 to 2139, including all types of items that can be “kept in inventor” that are not weapons or armors (including gold). In addition, some symbols that the tool displays are also numbered (hp, mp column index, ...). The coding characteristics here follow a “certain” rule that I “have not yet realized”
2. Monster codes.
- The tool divides a total of 704 types of monsters. The coding here is mainly based on LvM. Changing the codes in this area should be limited, because basically, the file “d2hackmap.cfg” is used quite a lot. Of course, if you can manage the operations, reformatting everything is not too difficult.
- In addition, in the new map of the server there are monsters called "the evil force". These are monsters that have not been defined in the game so the Tool cannot display them. That is the reason why when entering the new map, the monster location cannot be displayed on the minimap.
3. Missile codes
- Includes “flying” units (eg arrows, bolts,…) that are created from other units (monsters, players, traps,…).
- It can be understood in another sense, like the “projectile trajectory” of the units. There are 681 types of missles, including all types of missles in the game. Everyone should look through the names of the types of missles here, or use google to understand more about missles.
4. Areas codes and Special object names in the game:
- Area (AreaS) in the game are coded according to ATC. There are a total of 132 Areas. There are also special goals (Special Object Names) displayed on Minimap (Cairn’s Stone, Tree of Inifuss, ...).
5. Function key codes (virtual key)
- Includes coding of keys in the system. Changes to the code in this area should be kept to a minimum.
- Each code will correspond to 1 “operation” defined in the “windown available system”. For example, the default code Vk_A is the code for the operation “Press A key” on the keyboard.
Functions in File: (I will add more)
1.Show CFGCheck Info : 0
2.Enable Language Check : 0
3.GameFilterSupport: 0
4.Localization Support: 0
5.CFG Version Eng : “Have fun!!”
//From 1 to 5: commands that display the results when checking when the tool is just turned on. Only displayed when in the room.
6.Reload Config Key:
//Reload all tool information.
7.Perm Show Items Toggle:
//Show all items on the ground. Similar to the default Alt key in the game. But no need to hold the key, just press it once.
8.Monster Resists Toggle:
//Display the monster's resists.
9.Socket Protect Toggle:
//Socket blocking mode on item.
10.View Socketables Toggle:
//Display information about runes, jewels, and gems that have been plugged into the item
11.Item Basic Stats Toggle:
//Display the original index of the stat table
12.View Socket Base Items Toggle :
//Display the original information of a socketed item.
13.Quick Next Game Key:
//Quickly exit the game. When you press this key, the game ends and the last number of the current room name is automatically increased by 1 (defined in command number 36).
14.View Equipment Key:
//Show other player's equipment (point mouse at it and press key)
15.Hidden Items Toggle:
//Display items marked as hidden as defined in the operations in statement 54
16.Switch Item Show Mode:
//Display aggregated information from items (r,%fhr,%frw,…) in the stat table
17.Show Base Stat:
//Display the original index.
18.Default Game Name:
19.Default Game Password:
//18+19: game name and default password when activating the tool.
20.Bug Auto Quit Toggle:
//Bug automatically exits the game
21.Bug Alert Times:
//Bug notification warning time.
22.Skip Quest Message:
//Ignore messages from Quests.
23.State Monitor Toggle:
//Displays character status information. When activated, it will display the time that buffs (allowed to be displayed) have existed on the character.
//State Monitor[2] : 1 , “Poison” , “Trucizna”
//State Monitor[11] : 1 , “ColdSlow” , “Zniedoleznienie”
//State Monitor[61] : 1 , “LowerRes” , “Zmniejszenie odpor”
//State Monitor[62] : 1 , “OpenWound” , “³öѪ”
//State Monitor[60] : 1 , “Decrepify” , “Ë¥ÀÏ”
//State Monitor[1] : 1 , “Freeze” , “Zamarzniecie”
//State Monitor[8] : 3 , “Salvation” , “¾ÈÖú”
//State Monitor[159] : 3 , “Fade” , “ÄÜÁ¿Ïû½â”
//State Monitor[149] : 3 , “OakSage” , “Oak¼ÓѪ”
//State Monitor[16] : 3 , “QH” , “Ç¿»¯”
//State Monitor[10] : 3 , “FrozenArmor” , “Zbroja mrozu”
//State Monitor[20] : 3 , “ChillingArmor” , “Ladowata zbroja”
//State Monitor[88] : 3 , “ShiverArmor” , “Zamrazajaca zbroja”
//State Monitor[32] : 3 , “BattleOrders” , “Boo”
//State Monitor[51] : 3 , “BattleCommand” , “Dowodzenie”
//State Monitor[26] : 3 , “Shout” , “Okrzyk”
//State Monitor[134] : 3 , “ShrineSkill” , “Kapa”
//State Monitor[137] : 3 , “ShrineExp” , “Kapa expa”
//State Monitor[101] : 3 , “HolyShield” , “Swieta tarcza”
24.Show Exp Toggle:
25.Show Ping Toggle:
//24+25: Display Exp index in Ping.
26.Out Town Select Toggle:
//Not sure about this.
27.Kill Count Toggle:
28.GetHit Count Toggle:
//27+28: display the number of monsters (27) into the number of hits received (28)
29.Show Base ED Toggle :
// Display the original ED index of the item
–
30.Show Party Position Toggle:
//Display party member position.
31.Show Party Level Toggle:
//Display the level of party members
32.Full Visuals Toggle:
// Unknown effect.
33.Weather Toggle:
//Display weather.
34.Infravision Toggle:
// Unknown effect.
35.Light Radius Toggle:
// Maximize visibility.
36.Right Click Swap Toggle:
37.Ctrl Click Swap Toggle :
// Use shortcut to move item: pick up item then right click (36) or hold ctrl then left click (37)
38.Quick Drop Toggle :
//Allow quick item discarding using operations 36 and 37.
39.Game Time Toggle:
40.Clock Toggle:
41.Layer Level No Toggle :
42.Server Ip Toggle:
43.Area Level Toggle:
//39 to 43: Display room information including time from entering the game to present (39), display clock according to computer clock (40), layer levels (41), server IP (43) and current area level (43)
44.Mini Shrines Toggle:
// Show Srhines on minimap
45.Automap Level Names Toggle:
//Display the names of the areas on the automap
46.Level Name Colour:
//Color of area name on minimap
47.Automap Items Toggle:
//Show item markers on minimap
48.Rune Numbers Toggle:
//Rune numbering.
49.Automap Party Default:
50.Automap Names Default:
//Display party location (49) and party name (50) on automap
51.Auto Invite Toggle:
//Automatically invite other players to the party
52.Auto Party Toggle:
//Automatically accept party invites
53.Auto Loot Permit :
//Unknown effect.
55.Hidden Corpses Toggle: 0, -1
//Hide the monster's corpse on the screen
56.Automap Corpses Toggle: 0, -1
//Hide monster corpses on minimap
57. Some commands to colorize monster corpses. When using, remove the 2 // marks at the beginning of the command.
//Normal Corpse Color: 0x08
//Boss Corpse Color: 0x08
//Minion Corpse Color: 0x08
//Champion Corpse Color: 0x08
//Monster Corpse Colors[0+]: 0x08
//Monster Corpses[0+]: 1
58.Party Player Text Color: 2
59.Neutral Player Text Color: 9
60.Hostile Player Text Color: 1
//58 to 60: Commands that set the color of the names of party members (58), Neutral (59) and Opponents (60)
61.Neutral Player Color: 0x6f
62.Hostile Player Color: 0x5b
63.Friend Minion Color : 0x7f
64.Player Minion Color: 0xcb
//61 to 64: Commands that determine the color displayed on the minimap of Neutral members (61), Opponents (62), Party members and units (63), and own units (64).
65.Automap Monsters Toggle: 1, VK_DIVIDE
//Activation command to display monster location on minimap
66. Commands to mark monster colors on the minimap
Normal Monster Color: 0x62
Boss Monster Color: 0x5b
Minion Monster Color: 0x66
Champion Monster Color: 0x68
Act5 Barbarian Color: 0x9f
Super Unique Color : 0x6f
Monster Colors[Undead Stygian Doll 1]: 0x9b
Monster Colors[Undead Stygian Doll 2]: 0x9b
Monster Colors[Gloam 1]: 0x9b
Monster Colors[Gloam 2]: 0x9b
Monster Colors[Burning Soul 1]: 0x9b
Monster Colors[Burning Soul 2]: 0x9b
Monster Colors[734]: 0x9b
Monster Colors[Black Soul 1]: 0x9b
Monster Colors[Black Soul 2]: 0x9b
Monster Colors[Soul Killer 3]: 0x9b
Monster Colors[Soul Killer 4]: 0x9b
Monster Colors[Frenzied Ice Spawn]: 0x9b
Monster Colors[Tomb viper 1]: 0x9b
Monster Colors[Tomb Viper 2]: 0x9b
Monster Colors[Undead Soul Killer 2]: 0x9b
Monster Colors[411]: 0x20 //wake of fire
Monster Colors[412]: 0x20 //Charged Bolt Sentry
Monster Colors[413]: 0x20 //Lightning Sentry
Monster Colors[417]: 0x20 //Death Sentry
Monster Colors[352-354]: 0x20 //Hydra1-Hydra3 »ðÁúÒ»´Î3Í·£¬·Ö±ð¶ÔÓ¦1,2,3
67. Commands to mark monster information on the minimap
Monster Desc Color: Red
Enchantment Descs: 0
Extra Strong Desc: “S”
Extra Fast Desc: “F”
Cursed Desc: “”
Magic Resistant Desc: “%8m”
Fire Enchanted Desc: “E”
Lightning Enchanted Desc: “%9LE”
Cold Enchanted Desc: “E”
Thief Desc: 0
Mana Burn Desc: “%3MB”
Teleportation Desc: “T”
Spectral Hit Desc: “H”
Stone Skin Desc: “%4SS”
Multiple Shots Desc: “MS”
Ghostly Desc: “Ghost”
Fanatic Desc: “Fan”
Possessed Desc: “Poss”
Berserker Desc: “”
Champion Desc: 0
– Auras Enhanced:
Aura Descs : 0
Might Aura Desc: “ur”
Holy Fire Aura Desc: “ire”
Blessed Aim Aura Desc: “less”
Holy Freeze Aura Desc: “reez”
Holy Shock Aura Desc: “%9Shock”
Conviction Aura Desc: “onv”
Fanaticism Aura Desc: “ana”
– Immunities:
Immunity Descs : 0
Physical Immunity Desc: “%4i”
Magic Immunity Desc: “%8i”
Fire Immunity Desc: “%1i”
Lightning Immunity Desc: “%9i”
Cold Immunity Desc: “%3i”
Poison Immunity Desc: “%2i”
68.Automap Chests Toggle: 1, VK_DIVIDE
//Command to activate the display of the inventory on the minimap
69.Closed Chest Color: 0x09
70.Locked Chest Color: 0x08
//69+70: Command to color mark normal chests (69) and locked chests (70) on the minimap
71.Automap Missiles Toggle: 1, VK_DIVIDE
//The command to activate the Missiles on the minimap.
//72. Commands to color mark certain types of missiles on the minimap.
Hostile Missile Color: 0x62
Guided Missile Color: 0x5b
Tracer Missile Color: 0x97
Other Missile Color: 0x84
Missile Colors[All Arrows]: -2
Missile Colors[BoneSpirit]: 0x20
Missile Colors[teeth]: 0x20
Missile Colors[BoneSpirit]: 0x20
//71.Command to mark ethereal item name
Ethereal Item Prefix: “[Eth]”
Ethereal Item Postfix: “[Eth]”
COMMANDS TO DISPLAY ITEMS IN GAME.
